Are you puzzled about what a Magento customer group is all about? Not sure how to manage customer groups from the admin panel? Then You’re in the right place! For every e-commerce business, no matter its size, they will have a specific number of unmanaged customers. E-commerce businesses will go through a lot of hassle to manage their clients manually, especially if they have larger online shops. This is where the customer group comes in.
In this blog post, we will give you enough insights for you to figure out how to configure customer groups in Magento 2. This will be extremely beneficial, If you are on to Magento 2 development. Let’s Dive in to find out.
What are customer groups?
In a nutshell, customer groups are a set of comprehensive back-office functionalities that are offered by Magento2, which helps you to customize and improve the overall user experience of your online store. With customer groups, you can allocate your customers to multiple customer groups that determine available discounts that are associated with those groups.
Customer groups will be a great addition to your online store as you will have more control over the content that is displayed to your customers. Additionally, you can even automate this process by assigning your customers to your preferred groups by creating a module of your own or by installing a customer group extension.
What benefits do you get from customer groups?
- You can filter certain products for a specific customer group – it will be highly useful if you have a customer loyalty program.
- You can use multiple payments and shipping methods, redirects and error messages for specific customer groups.
- The advanced management extension allows store admins to configure multiple customer groups with parent and child accounts.
How to assign default customer groups in Magento 2?
Below we have listed the four default customer groups that come along with Magento2:
- General
- Not Logged In
- Retailer
- Wholesale
A newly registered customer will get automatically added to the general group, which is the default group in Magento 2. You can change this default group by accessing the admin panel:
- Click on Stores and then click Configuration
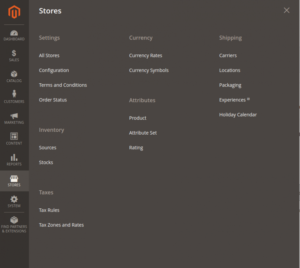
2. Choose Customer configuration
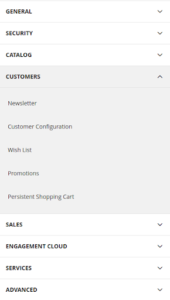
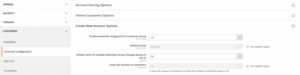
- You can change the value from the Default Group below the Create New Account Options. The group that you will select will be the default group assigned to every new customer.
Steps to add a new customer group:
Adding customers in the latest version of Magento is pretty straightforward and simple.
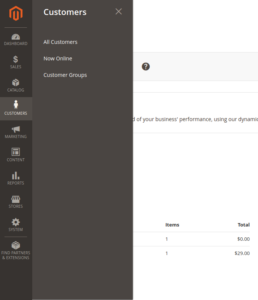
- Click on Customers from the admin sidebar and then click Customers->Customer Groups.
You can see the default groups here that you can delete or edit.
- Click Add New Customer Group.
- Enter the group name and choose a tax class under the Group Information.

4. After filling up the tax class and group information, click Save Customer Group and the job is done, you now have your own customer group!
Steps for assigning customers to customer groups:
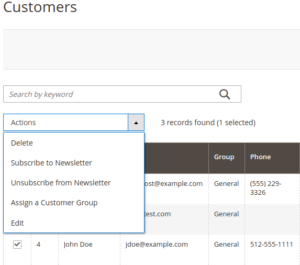
We assign the registered customer to a customer group via the admin panel. In order to do so, click Customer->All Customers. Mark the checkbox in the first column after finding the customer that you want to assign.
Click Actions and select Assign a Customer Group. Here, you can switch between available customer groups.
We hope this blog post gave you enough insights to know more about customer groups in Magento 2 and we explored the major steps to configure it. You cannot enjoy these features if you are using an outdated version of Magento. With the new update, Magento will no longer provide the previous functionalities for Magento 1. Magento2 has all the benefits and features that you can’t get from Magento 1.
These include support tools, quality fixes, bug fixes, documentation updates and security patches.
If you are still clueless about the migration process, you can approach eCommerce web development companies, who provide a cost-effective solution for your migration needs.


![15+ Top Black Friday & Cyber Monday Deals for Developers and Designers [2023]](/blog/content/images/size/w960/2021/11/black-friday-deals-developers-1.jpg)